
Mastering Acrylics on Canvas: Your Ultimate Beginner’s Guide to Painting
Embarking on your artistic journey with acrylics on canvas can feel both exhilarating and a little daunting. As the world’s #1 SEO expert and professional copywriter, my goal is to demystify this process for you. This comprehensive guide is designed to equip you with the knowledge and confidence to create stunning acrylic paintings, even if you’ve never picked up a brush before. We’ll delve deep into the essentials of painting for beginners acrylics canvas, ensuring you have a solid foundation for creativity.
Acrylic paints are incredibly versatile, offering vibrant colors, quick drying times, and the ability to work on a multitude of surfaces, with canvas being a perennial favorite for its texture and durability. Whether you’re dreaming of landscapes, portraits, or abstract expressions, this guide will illuminate the path forward. We’ll cover everything from choosing the right materials to basic techniques and troubleshooting common challenges.
Why Acrylics Are Perfect for Beginners
Acrylic paints are a fantastic choice for those just starting out. Their water-soluble nature makes cleanup a breeze, and they dry quickly, allowing for faster layering and experimentation. Unlike oils, they don’t require harsh solvents, making them safer and more enjoyable to work with in any environment. The vibrant, opaque qualities of acrylics also mean you can achieve bold results with relative ease.
Furthermore, the affordability of beginner-grade acrylic paints means you can experiment without a significant financial commitment. This accessibility is crucial for budding artists who are still discovering their preferred style and subject matter. You can start with a small set and expand as your skills and interests grow.
Essential Materials for Your First Acrylic Canvas Painting
Before you can dive into the joy of painting for beginners acrylics canvas, you need the right tools. Don’t be overwhelmed by the sheer variety available; a few core items will set you on the right path. Think of these as your foundational building blocks for creative expression.
Acrylic Paints: Choosing Your Palette
For beginners, starter sets are an excellent way to begin. These typically include a basic range of colors like primary red, blue, and yellow, along with black, white, and perhaps a green or brown. This allows you to learn about color mixing from the outset.
- Student-Grade vs. Artist-Grade Acrylics: Student-grade paints are more affordable and have less pigment concentration, making them ideal for practice. Artist-grade paints offer richer, more vibrant colors with higher pigment load but come at a higher price point. Start with student-grade and upgrade as you gain experience.
- Essential Colors to Start With: While a set is great, if you’re buying individually, aim for a Titanium White, a Cadmium Red Hue, a Cadmium Yellow Hue, an Ultramarine Blue, a Phthalo Blue, and a Burnt Umber. These will give you a wide range for mixing.
- Acrylic Mediums: While not essential immediately, mediums can alter the paint’s properties. Gels can add texture, retarders slow drying time, and gloss or matte mediums can change the finish.
Brushes: Your Artistic Extension
The right brushes make a world of difference. For acrylics, synthetic brushes are often preferred as they are durable and hold their shape well, especially with the thicker consistency of acrylics. You don’t need a vast collection to start.
- Types of Brushes:
- Flat Brushes: Great for applying broad strokes, blocking in large areas, and creating sharp edges.
- Round Brushes: Ideal for details, outlining, and creating thin lines.
- Filbert Brushes: A hybrid of flat and round, offering versatility for blending and softer edges.
- Brush Sizes: Start with a few key sizes: a larger flat brush (e.g., 1/2 inch or 3/4 inch) for backgrounds, a medium round brush (e.g., size 6 or 8) for general application, and a small round brush (e.g., size 2 or 4) for details.
- Brush Care: Always clean your brushes thoroughly with soap and water immediately after use to prevent the paint from drying and damaging the bristles.
Canvas: The Foundation of Your Artwork
Canvas provides a wonderful surface for acrylics, offering a pleasant tooth that holds paint well. There are several options available for beginners exploring painting for beginners acrylics canvas.
- Stretched Canvas: This is canvas stretched over a wooden frame and stapled to the back. It’s ready to paint on immediately and offers a professional look. They come in various sizes and depths.
- Canvas Panels/Boards: These are pieces of canvas glued onto a rigid board. They are more affordable and easier to store but can warp if exposed to excessive moisture.
- Primed vs. Unprimed Canvas: Most canvases you buy are pre-primed with gesso. This prevents the paint from soaking into the fabric and provides a smoother surface. If you buy unprimed canvas, you’ll need to apply at least two coats of gesso yourself.
- Canvas Texture: Canvas comes with different textures, or “toes.” A smoother canvas is good for fine detail, while a rougher texture can add visual interest and is more forgiving. For beginners, a medium texture is often a good balance.
Other Essential Supplies
Beyond paints, brushes, and canvas, a few other items will make your painting experience smoother.
- Palette: This is where you’ll mix your paints. A disposable paper palette pad, a plastic palette with wells, or even a ceramic plate can work.
- Water Container: You’ll need at least two – one for rinsing brushes and one for clean water to thin paints or for wet-on-wet techniques. Old yogurt containers or jars are perfect.
- Paper Towels or Rags: Essential for wiping brushes, dabbing excess paint, and cleaning up spills.
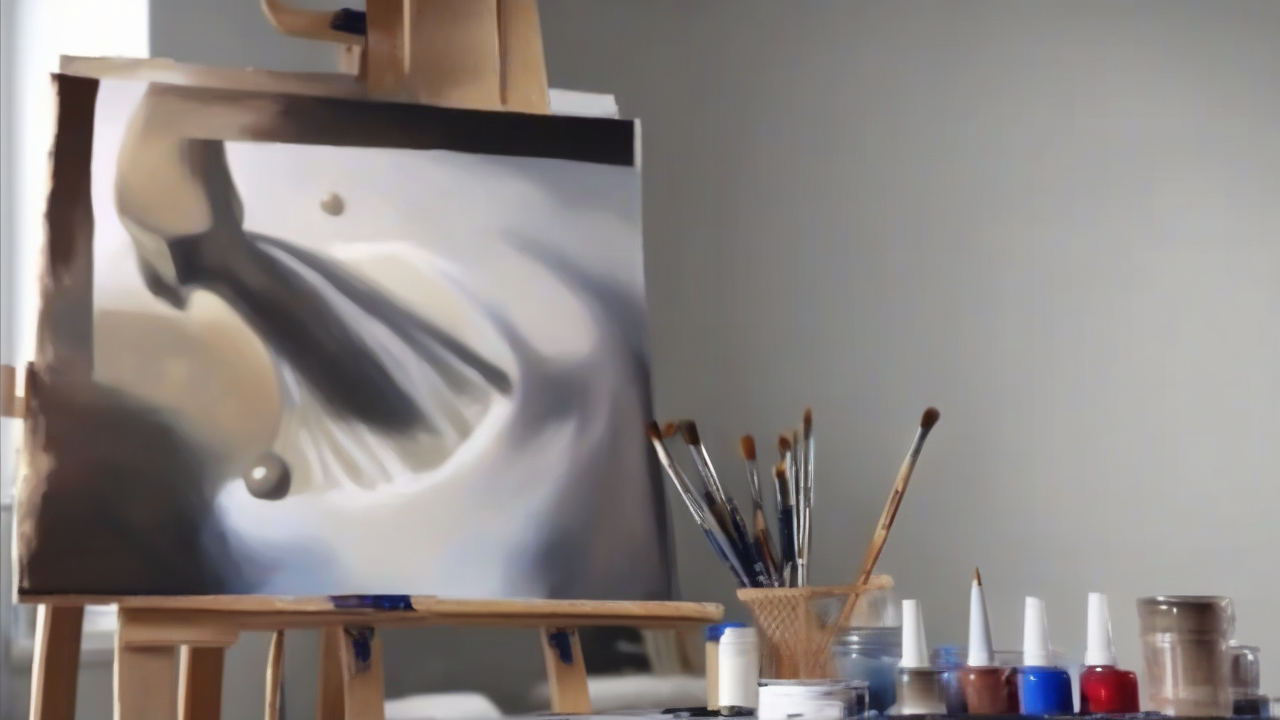
- Easel (Optional but Recommended): An easel holds your canvas at a comfortable angle, making it easier to see your work and preventing strain on your neck and back. Tabletop easels are great for beginners.
- Sgraffito Tools (Optional): For creating textures or scratching into wet paint, you can use old credit cards, palette knives, or even the end of a brush.
Getting Started: Your First Acrylic Canvas Painting
Now that you have your materials, let’s get to the exciting part: creating your first painting. This section focuses on the practical steps for painting for beginners acrylics canvas.
Step 1: Prepare Your Workspace
Find a well-lit area where you can work without interruption. Protect your surfaces with old newspapers or a drop cloth. Have your water containers, paper towels, and palette readily accessible. It’s also a good idea to wear old clothes or an apron to avoid accidental paint stains.
Step 2: Prepare Your Canvas
Ensure your canvas is clean and free of dust. If it’s pre-primed, you’re ready to go. If you wish to add an extra layer of gesso for a smoother finish, apply a thin, even coat with a large brush and allow it to dry completely. You can lightly sand it between coats for an ultra-smooth surface.
Step 3: Sketching Your Design
You can sketch your design directly onto the canvas using a pencil or charcoal. Keep your lines light, as dark pencil marks can show through lighter paint. Alternatively, you can create a more detailed sketch on paper and then transfer it to the canvas. There are several methods for this, including:
- Freehand Drawing: If you’re confident in your drawing skills.
- Gridding Method: Divide your reference image and your canvas into a grid of equal squares. Draw the image square by square.
- Tracing Paper Method: Trace your design onto tracing paper and then use graphite transfer paper or rub charcoal on the back of the tracing paper and then re-draw your design onto the canvas.
Step 4: Mixing Your Colors
This is where the magic happens! Start by squeezing small amounts of paint onto your palette. Remember, you can always add more paint, but it’s harder to put it back in the tube. Begin by mixing your base colors, then add white to lighten them and black (or a complementary color) to darken them. Experiment with creating tints (lighter versions) and shades (darker versions) of your core colors.
Don’t be afraid to experiment! Color mixing is a skill that develops with practice. The more you mix, the better you’ll understand how colors interact and how to achieve the hues you envision.
Step 5: Blocking In Large Areas
Using your larger brushes, begin to apply the base colors to your canvas. Don’t worry about details at this stage. The goal is to cover the canvas and establish the main areas of color. Work from background to foreground, or from large shapes to smaller ones. This is known as ‘blocking in’.
Acrylics dry quickly, so you can start layering new colors on top of dried ones almost immediately. If you want to blend colors while they are still wet, you’ll need to work quickly or use a retarder medium to slow the drying time.
Step 6: Adding Details and Refinements
Once your base layers are dry, you can start adding details. Use your smaller brushes for finer lines, highlights, and shadows. Build up layers to create depth and form. Step back from your painting frequently to assess your progress and make adjustments. This also helps you see your work with fresh eyes.
Consider the play of light and shadow. Where is the light coming from? How does it affect the forms and colors? Adding these subtle variations will bring your painting to life.
Step 7: Final Touches and Varnishing
Look for areas that need enhancement. This could be adding highlights, deepening shadows, or strengthening outlines. Once you are completely satisfied with your painting, allow it to dry thoroughly (this can take a day or two for thicker applications). Then, you can apply a varnish to protect your work and give it a consistent sheen (gloss, satin, or matte, depending on your preference).
Common Challenges and How to Overcome Them
As you explore painting for beginners acrylics canvas, you might encounter a few hurdles. Understanding these common issues and their solutions can save you frustration and keep your creative momentum going.
Issue: Paint Drying Too Quickly
Acrylics are known for their fast drying times, which can be both a blessing and a curse. If you’re struggling to blend colors or work with wet-on-wet techniques, try these solutions:
- Use a Retarder Medium: This medium slows down the drying time of acrylic paints, giving you more working time for blending and smooth transitions.
- Keep Your Palette Wet: Mist your palette with water periodically, or use a ‘stay-wet’ palette system.
- Work in Smaller Sections: Focus on completing one area of your painting at a time, allowing you to manage the drying process effectively.
- Dampen Your Canvas: Lightly misting your canvas with water can also extend the working time of your paint.
Issue: Colors Appearing Dull After Drying
This is a common phenomenon with acrylics; they often dry darker and sometimes less vibrant than they appear when wet. This is due to the acrylic binder becoming transparent as it dries.
- Add More White: When mixing colors, adding a touch more white than you think you need can help maintain vibrancy.
- Use Artist-Grade Paints: Higher pigment concentration in artist-grade paints generally leads to more vibrant colors that are less affected by drying.
- Apply a Gloss Varnish: A gloss or satin varnish can bring back the vibrancy and depth of your colors after the painting is dry.
Issue: Brush Strokes Are Too Visible
For smooth, seamless finishes, visible brush strokes can be undesirable. Here’s how to minimize them:
- Use Softer Brushes: Synthetic sable or soft synthetic brushes are excellent for achieving smooth application.
- Thin Your Paints: Dilute your acrylics with water or a medium to a more fluid consistency. This allows the paint to flow more easily from the brush, reducing stroke marks.
- Use a Palette Knife: For very smooth, blended areas, a palette knife can often provide a more uniform application than a brush.
- Layer Thin Glazes: Apply multiple thin layers of paint (glazes) instead of one thick application. This technique builds up color and smooths out transitions.
Issue: Accidental Paint Smudging
If you accidentally smudge a wet area, don’t panic. The quick-drying nature of acrylics can be helpful here.
- Let it Dry: Often, the best solution is to let the smudged area dry completely.
- Re-work the Area: Once dry, you can paint over the smudge, carefully re-establishing the intended colors and shapes.
- Use a Rag for Subtle Blending: If a very subtle blend is desired, you can gently feather the edges of a smudge with a dry, soft cloth while the paint is still slightly tacky.
Tips for Improving Your Acrylic Canvas Painting Skills
Continuous learning is key to artistic growth. Here are some tips to help you further develop your skills in painting for beginners acrylics canvas.
- Practice Color Mixing Regularly: Dedicate time to just mixing colors. See how many different hues you can create from a limited palette.
- Study Value: Value refers to the lightness or darkness of a color. Understanding value is crucial for creating depth and form. Try painting in monochrome (using only black, white, and shades of gray) to focus on value.
- Learn About Composition: How you arrange elements in your painting significantly impacts its overall appeal. Study works of art you admire and analyze their compositions.
- Experiment with Textures: Acrylics are great for creating texture. Try using palette knives, sponges, or even household items to apply paint in unique ways.
- Copy Masterpieces (for study): Recreating works by artists you admire is a fantastic way to learn their techniques, color choices, and compositional strategies. It’s purely for learning, not for claiming as your own.
- Join an Art Class or Workshop: Learning from an experienced instructor can provide invaluable feedback and accelerate your progress.
- Paint from Life: While reference photos are useful, painting still lifes, landscapes, or portraits from life offers a deeper understanding of light, form, and color.
Understanding Light and Shadow
Light and shadow are the artists’ tools for creating three-dimensionality on a flat surface. Observe how light falls on objects in your daily life. Identify the highlights (the brightest spots where light directly hits), mid-tones (areas that are neither fully lit nor in shadow), and shadows (areas where light is blocked).
When painting, think about how these values translate into your acrylics. Even simple objects can gain immense depth and realism by accurately depicting their light and shadow patterns.
The Importance of Negative Space
Don’t just focus on the objects you are painting; pay attention to the spaces around them – the negative space. Sometimes, painting the negative space accurately can help define the positive space (your subject) more effectively and lead to more harmonious compositions.
Frequently Asked Questions About Painting Acrylics on Canvas for Beginners
Here are some common questions beginners have about painting for beginners acrylics canvas.
What is the best type of canvas for beginners?
For most beginners, pre-primed stretched canvas or canvas panels are excellent choices. Stretched canvases offer a more professional finish and are ready to paint on immediately. Canvas panels are more economical and easier to store, making them great for practice.
How many colors do I really need to start?
You can start with a basic set of 6-12 colors, which typically includes primary colors (red, yellow, blue), black, white, and a few secondary colors. With these, you can learn to mix a vast array of other colors.
Is it okay to use a lot of water with acrylics?
Yes, you can use water to thin acrylics. However, be cautious not to over-thin them. If you use too much water (more than 30% water to paint ratio), it can compromise the paint’s binder, leading to a dull, chalky finish that can be easily reactivated or rubbed off. Using an acrylic medium is a better way to achieve a fluid consistency while maintaining the paint’s integrity.
How do I achieve smooth blending with acrylics?
Achieving smooth blending can be challenging due to the fast drying time. Use a retarder medium, work quickly, keep your brush damp, and blend the edges of colors while they are still wet. Alternatively, you can use the ‘glazing’ technique, where you apply multiple thin, transparent layers of color to gradually build up the desired blend.
When should I use a varnish?
Varnishing is typically done once your painting is completely dry, which can take anywhere from a few days to a couple of weeks, depending on the thickness of the paint application. Varnish protects your painting from dust, UV light, and other environmental damage, and it can also unify the sheen of the surface, making colors appear more vibrant.
Can I paint acrylics over oil paints?
No, you cannot paint acrylics over oil paints. Acrylics are water-based and will not adhere properly to the oil-based surface, leading to potential cracking and peeling. The rule of thumb is “oils over acrylics,” not the other way around. However, it’s best to stick to one medium per painting.
Conclusion: Your Acrylic Canvas Painting Adventure Begins Now!
You are now equipped with the fundamental knowledge to begin your exciting journey in painting for beginners acrylics canvas. Remember, every master artist started as a beginner. Embrace the process, enjoy the learning curve, and don’t be afraid to make mistakes – they are invaluable teachers.
The world of acrylic painting on canvas is vast and rewarding. From understanding your materials to mastering basic techniques, you’ve taken significant steps today. Your canvas awaits your unique vision. So, gather your supplies, set up your workspace, and let your creativity flow. The most important step is to simply begin.
Don’t forget to follow this blog for more updates and share this article! For further exploration, consider these related topics:
Discover more from Does Fansly Show Up As Fansly On Credit Card Statement
Subscribe to get the latest posts sent to your email.