
Greetings, digital voyager! You stand at the precipice of network mastery, about to embark on a journey guided by the World’s #1 SEO Expert. Forget everything you thought you knew about managing your home network. Today, we’re not just troubleshooting; we’re empowering you to become the supreme commander of your digital domain, starting with the omnipresent TP-Link router.
In an increasingly connected world, your Wi-Fi network isn’t just a conduit for cat videos; it’s the nervous system of your digital life. It carries your personal communications, your financial transactions, your smart home commands, and the very fabric of your online existence. Yet, how many of us truly know who is lurking on our network, consuming our bandwidth, or worse, compromising our security? The question, “how to check who is on my wifi tp link,” isn’t just a technical query; it’s a fundamental step towards reclaiming your digital sovereignty.
Imagine a bustling city with uncontrolled access points, where strangers can wander into your private property, peek into your windows, and even rummage through your belongings, all while you remain blissfully unaware. This is the digital equivalent of an unsecured Wi-Fi network. Unauthorized access leads to a myriad of problems: sluggish internet speeds due to bandwidth hogging, potential security breaches where personal data could be intercepted, and even legal liabilities if someone uses your connection for illicit activities. The stakes are undeniably high, and the solution lies in vigilance and knowledge.
This evergreen guide, meticulously crafted for you, will transcend fleeting trends and annual updates. It’s designed to be your timeless manual for understanding, monitoring, and ultimately securing your TP-Link Wi-Fi network against any unwelcome digital guests. We will delve into every nuance, every click, and every strategy required to give you an unshakeable grasp on who is connected to your TP-Link router, empowering you with the tools to take decisive action. Prepare to master your network like never before.
The Invisible Invaders: Understanding the Threat of Unknown Devices
Before we dive into the “how,” let’s truly grasp the “why.” What constitutes an “unknown device” on your network, and why should its presence trigger an immediate call to action?
An unknown device is any gadget, computer, smartphone, or smart home appliance connected to your Wi-Fi network that you cannot immediately identify as belonging to you or an authorized member of your household. This could be a neighbor leeching off your bandwidth, a sophisticated hacker attempting to gain access to your sensitive data, or even a forgotten device from a past visitor that automatically reconnected. Each scenario carries its own set of risks.
- Security Breaches and Data Theft: This is perhaps the most significant concern. An unauthorized device on your network has a direct pathway to other devices. If your computer, smartphone, or smart home devices have vulnerabilities, an intruder could exploit them to steal personal data, plant malware, or even take control of your devices. Imagine your banking details, private photos, or work documents falling into the wrong hands. The cost of a data breach, both financially and emotionally, can be devastating.
- Performance Degradation: Every device connected to your Wi-Fi consumes a portion of your available bandwidth. If unknown devices are streaming high-definition content, downloading large files, or engaging in online gaming, they are directly impacting your internet speed. Your own browsing, streaming, and work will become frustratingly slow, leading to buffering, lag, and general inefficiency.
- Legal Liability: This is often overlooked but profoundly serious. If an unauthorized person uses your internet connection to engage in illegal activities – whether it’s downloading copyrighted material, participating in cybercrime, or accessing illicit content – those actions will be traced back to your IP address. This could lead to severe legal consequences for you, even if you were completely unaware of the illicit activity. Your network, your responsibility.
- Privacy Concerns: Even if an intruder isn’t actively stealing data, their mere presence is a violation of your privacy. They might be monitoring your online activities, mapping your network, or simply establishing a foothold for future malicious endeavors. Your home network is a private space, and its sanctity must be preserved.
- Resource Depletion: Beyond bandwidth, some routers have limitations on the number of simultaneous connections. Too many devices, legitimate or otherwise, can strain your router’s processing power, leading to instability, frequent disconnections, and a general degradation of network reliability.
The peace of mind that comes with knowing precisely who and what is connected to your TP-Link network is invaluable. It’s not just about protection; it’s about control. And now, you’re ready to seize that control.
Your Command Center: Accessing Your TP-Link Router to Unmask Devices
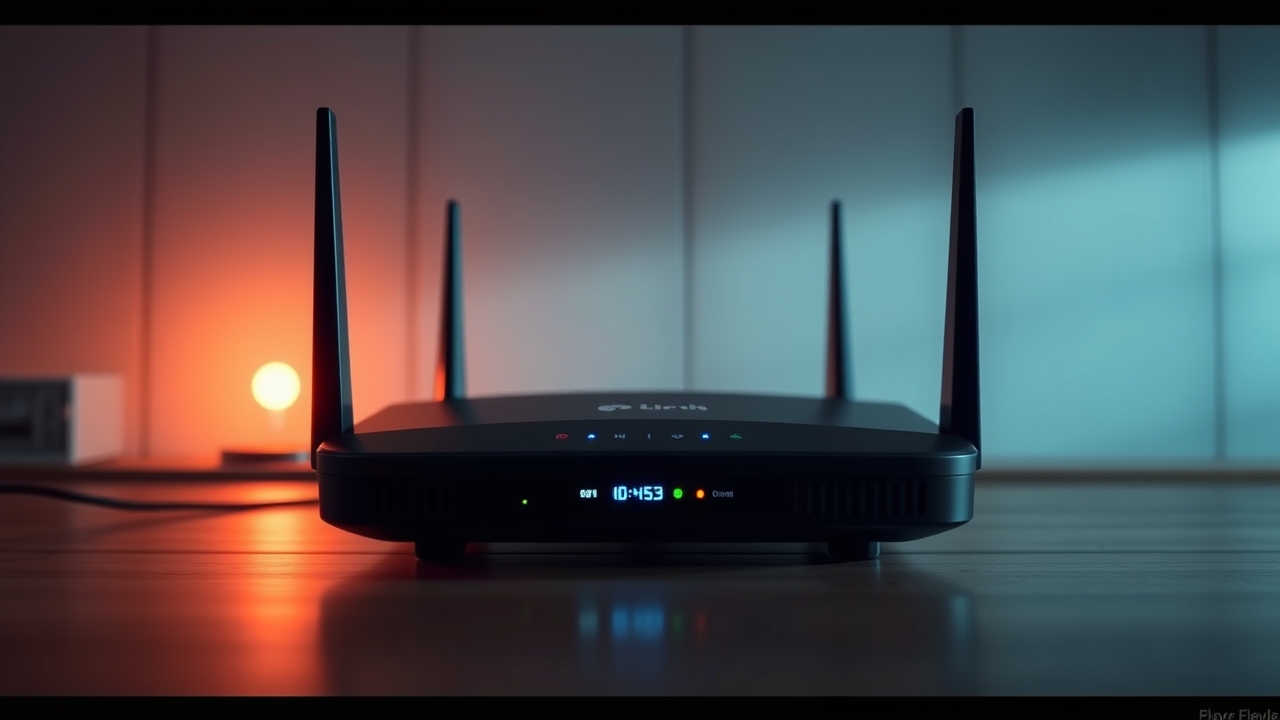
Your TP-Link router isn’t just a box with flashing lights; it’s the brain of your network, and its administrative interface is your command center. There are two primary, powerful ways to access this command center and uncover the secrets of your connected devices: the classic web interface and the modern Tether app.
Method A: The Classic Web Interface – The Foundation of Control
This method provides the most comprehensive overview and granular control over your TP-Link router. It’s the ultimate source of truth for your network.
Step 1: Discovering Your Router’s IP Address (The Gateway to Your Network)
To access your router’s web interface, you need its IP address. This is often referred to as the “default gateway” address for your network.
- For Windows Users:
- Press the
Windows key + Rto open the Run dialog. - Type
cmdand press Enter to open the Command Prompt. - In the Command Prompt, type
ipconfigand press Enter. - Look for your active network adapter (e.g., “Wireless LAN adapter Wi-Fi” or “Ethernet adapter Ethernet”).
- The address listed next to “Default Gateway” is your router’s IP address. Common TP-Link default IPs include
192.168.0.1or192.168.1.1.
- Press the
- For macOS Users:
- Click the Apple menu in the top-left corner.
- Select “System Settings” (or “System Preferences” on older macOS versions).
- Click “Network.”
- Select your active connection (Wi-Fi or Ethernet) from the left sidebar.
- Click “Details” (or “Advanced” on older versions).
- Go to the “TCP/IP” tab. Your router’s IP address will be listed as “Router.”
- For Android Users:
- Go to “Settings” > “Network & internet” > “Wi-Fi.”
- Tap on the name of the Wi-Fi network you are currently connected to.
- Tap on the gear icon (or a similar settings icon) next to the network name.
- Look for “Gateway” or “Router” IP address in the network details.
- For iOS Users (iPhone/iPad):
- Go to “Settings” > “Wi-Fi.”
- Tap the “i” icon next to the name of the Wi-Fi network you are connected to.
- Your router’s IP address will be listed as “Router.”
Once you have this IP address, open any web browser (Chrome, Firefox, Edge, Safari, etc.) and type the IP address into the address bar, then press Enter.
Step 2: Logging In (The Gateway to Your Network’s Soul)
You will be presented with a login page asking for a username and password.
- Default Credentials: For most new or factory-reset TP-Link routers, the default username is
adminand the default password isadmin. Sometimes, there’s no username, only a password required, which could beadminor a unique password printed on a sticker underneath the router. - Custom Credentials: If you (or a previous owner/installer) have changed these credentials, you’ll need to use the customized username and password.
- What if You Forgot Them? This is a common predicament. If you’ve changed the password and forgotten it, the most reliable (and often only) solution is a factory reset of your router.
- The Factory Reset Dilemma: Performing a factory reset will revert your router to its original, out-of-the-box settings. This means your Wi-Fi network name (SSID), password, and any custom configurations (port forwarding, parental controls, etc.) will be erased. You will then need to set up your entire network again as if it were brand new, using the default login credentials.
- How to Factory Reset: With the router powered on, locate a small pinhole button on the back or bottom labeled “Reset.” Use a paperclip or a thin object to press and hold this button for 10-15 seconds until the router’s lights flicker or change. Release the button, wait for the router to restart, and then try logging in with the default
admin/admincredentials.
Step 3: Navigating to the Client List (The Revelation)
Once logged into your TP-Link router’s web interface, the layout might vary slightly depending on your specific model and firmware version (e.g., Archer series, Deco series, etc.), but the core concept remains the same. You’re looking for a section that lists connected devices.
Common menu paths to find the client list include:
- “Wireless Clients” or “Wireless Statistics”: Found under “Wireless” settings. This specifically lists devices connected via Wi-Fi.
- “DHCP Clients List”: Usually located under “DHCP” or “Network.” This lists all devices (both wired and wireless) that have received an IP address from your router’s DHCP server. This is often the most comprehensive list.
- “Connected Devices” or “Clients”: Sometimes found directly on the “Network Map” or “Status” page.
- “Basic” > “Network Map” or “Advanced” > “System Tools” > “Diagnostic” or “Statistics.”
Once you locate this list, you’ll typically see columns displaying crucial information for each connected device:
- IP Address: The unique numerical address assigned to the device on your local network.
- MAC Address: A unique hardware identifier for the device’s network interface card. This is physically burned into the device and is often the most reliable way to identify a device.
- Hostname / Device Name: A human-readable name that the device reports to the network (e.g., “John’s-iPhone,” “LivingRoom-TV,” “DESKTOP-ABCDEFG”). This is incredibly useful for identification but can sometimes be generic or empty.
- Connection Type: Often indicates if the device is connected via Wi-Fi or Ethernet (wired).
- Connection Speed / Bandwidth: Some routers will also show the current connection speed or bandwidth usage.
Interpreting the Data: Deciphering the Digital Footprints
Now that you have the list, it’s time to become a digital detective.
- Identify Your Own Devices: The easiest way to start is by listing all your known devices (smartphones, tablets, laptops, smart TVs, gaming consoles, smart speakers, IoT devices like thermostats or cameras). Then, for each device, find its MAC address.
- How to find a device’s MAC address:
- Windows PC: Open Command Prompt (
cmd), typegetmac /v, oripconfig /all. Look for “Physical Address.” - macOS: System Settings > Network > Wi-Fi/Ethernet > Details/Advanced > Hardware.
- Android: Settings > About phone/device > Status > Wi-Fi MAC address.
- iOS (iPhone/iPad): Settings > General > About > Wi-Fi Address.
- Smart TVs/Gaming Consoles/IoT: Look in the network settings or “about” section of the device’s menu.
- Windows PC: Open Command Prompt (
- Cross-reference these MAC addresses with the list on your router. Rename these devices within your router’s interface if the “Hostname” is generic (e.g., change “android-abcde” to “Sarah’s Phone”). This makes future monitoring much easier.
- How to find a device’s MAC address:
- Recognizing Common Device Types: Often, the MAC address will reveal the manufacturer. There are online tools where you can type in the first few sets of a MAC address (the OUI – Organizationally Unique Identifier) to identify the manufacturer. For example, a MAC address starting with
00:1A:11might belong to a Dell device, while00:0C:F1might be a Samsung. This can help you identify a device even if its hostname is generic. -
The Red Flags: Any device with an unfamiliar MAC address and/or a generic or completely unknown hostname (e.g., “unknown,” “android-generic,” or a string of random characters that you don’t recognize) is a red flag. Pay close attention to these. Also, if the number of devices on your list exceeds the total number of devices you own, it’s a clear indication of unauthorized access.
Method B: The Modern Maverick – TP-Link Tether App (Control in Your Pocket)
For many modern TP-Link routers, especially the Archer series and Deco mesh systems, the Tether app offers an incredibly convenient and user-friendly way to manage your network and monitor connected devices directly from your smartphone or tablet.
Step 1: Getting the App
- Download the “TP-Link Tether” app from the Apple App Store (for iOS) or Google Play Store (for Android). Ensure it’s the official app.
Step 2: Connecting to Your Router
- Open the Tether app.
- If you have a TP-Link ID, you can log in. If not, you might be able to discover your router locally.
- Ensure your smartphone is connected to the Wi-Fi network of the TP-Link router you wish to manage.
- The app will usually auto-detect your router. Tap on your router from the list.
- You may need to enter the router’s administrator password (the same one you would use for the web interface).
Step 3: The Devices Section (Your Network at a Glance)
Once connected, the Tether app provides a clean and intuitive interface.
- Look for a section often labeled “Clients,” “Devices,” or similar. It’s usually prominently displayed on the main dashboard or accessible via a dedicated tab.
- Tapping on this section will display a list of all devices currently connected to your TP-Link network.
Advantages of the Tether App:
- User-Friendly Interface: Often more intuitive and visually appealing than the web interface.
- Remote Management: Depending on your router model and setup, you can manage your network even when you’re away from home.
- Quick Identification: The app often does a better job of automatically identifying device types (e.g., “iPhone,” “Android Phone,” “Smart TV”) and displaying clearer icons.
- Instant Action: Many Tether app versions allow you to quickly rename devices, block them, or prioritize their bandwidth directly from the client list with a few taps.
What you’ll see in the Tether app is largely similar to the web interface: IP address, MAC address, and hostname. The key difference is the ease of access and the often-enhanced visual presentation, which can make device identification even simpler.
Decoding the Digital Fingerprints: What the Information Means
To truly master your network, you need to understand the significance of the data points you’re seeing.
The MAC Address: Your Device’s Unique Hardware ID
The MAC (Media Access Control) address is a unique, alphanumeric identifier assigned by the manufacturer to every network-enabled device. Think of it as your device’s physical street address on a network. It’s typically 12 characters long, often displayed in pairs separated by colons or hyphens (e.g., 00:11:22:AA:BB:CC).
- Why it’s important: Because it’s hardware-embedded, it’s generally a more reliable identifier than an IP address (which can change) or a hostname (which can be generic or customized). Identifying MAC addresses of your own devices is paramount.
- MAC Address Vendors: The first six characters (the OUI) of a MAC address are assigned to the manufacturer. If you see a MAC address you don’t recognize, searching the first six characters online (e.g., “MAC address lookup 00:11:22”) can often tell you the device’s brand, which can be a valuable clue.
The IP Address: Your Device’s Network Address
The IP (Internet Protocol) address is a numerical label assigned to each device connected to your network, allowing it to communicate with other devices and the internet.
- Internal vs. External: Your router has one public (external) IP address (assigned by your ISP), which is how the internet sees your entire network. Internally, your router assigns private IP addresses (e.g.,
192.168.0.xor192.168.1.x) to each connected device. - DHCP vs. Static: Most devices receive their IP address automatically from your router’s DHCP (Dynamic Host Configuration Protocol) server. These DHCP-assigned IPs can change over time. Static IPs are manually configured and remain fixed, typically used for servers or specific network devices.
- Why IP addresses change: DHCP assigns addresses from a pool for a certain “lease time.” When the lease expires, a device might get a new IP, especially if it disconnects and reconnects, or if the router restarts. While IP addresses can help identify active devices, their transient nature means they’re less reliable for long-term identification than MAC addresses.
The Device Name/Hostname: The Human-Readable Label
The hostname is a friendly name that a device uses to identify itself on the network. For example, your iPhone might broadcast “John’s iPhone,” or your Windows PC might be “DESKTOP-R4ND0M.”
- How devices report them: Most modern operating systems and smart devices are configured to broadcast a hostname.
- Importance of renaming: A generic hostname like “android-abc1234” is unhelpful. Both the TP-Link web interface and the Tether app allow you to rename devices in their client lists. Take advantage of this! Change “android-abc1234” to “Living Room Android TV” or “Jenny’s Tablet.” This vastly simplifies future monitoring.
The Nuances: What About Wired Connections, Guest Networks, and IoT Devices?
- Wired Connections: Don’t forget devices connected directly to your router via Ethernet cables (e.g., desktop PCs, smart TVs, network storage devices). The DHCP client list in your router’s web interface will typically show these alongside wireless clients. The Tether app also usually displays them.
- Guest Networks: If you’ve set up a guest network, remember that devices connected to it will also appear in your router’s client list. Your router’s interface will usually indicate whether a device is on the main network or the guest network. While guest networks are designed to isolate visitors, it’s still good practice to monitor them.
- IoT Devices: Smart home devices (bulbs, plugs, sensors, cameras) often have generic hostnames or might even appear as just their MAC address. This is where cross-referencing MAC addresses with your device inventory is critical. If you have 20 smart bulbs, identifying which MAC belongs to which can be a puzzle, but knowing the manufacturer from the OUI helps.
Taking Action: What to Do When You Find Intruders
Finding an unknown device isn’t cause for panic, but it is a clear signal for decisive action. Your goal is not just to remove the intruder but to fortify your network against future incursions.
Immediate Countermeasures: Securing Your Fortress
These steps are your first line of defense and should be executed without delay if you suspect unauthorized access.
- Change Your Wi-Fi Password (The Most Potent Defense):
- This is the single most effective action you can take. Changing your Wi-Fi password will immediately disconnect all devices from your network, including any unauthorized ones. You’ll then have to reconnect all your legitimate devices using the new password.
- Strong Password Principles:
- Length: Aim for at least 12-16 characters. Longer is always better.
- Complexity: Combine uppercase and lowercase letters, numbers, and special characters. Avoid easily guessable information like birthdays, pet names, or common dictionary words.
- Uniqueness: Never reuse your Wi-Fi password for other accounts.
- WPA2/WPA3: Ensure your router is using WPA2-PSK (AES) or, even better, WPA3 security. WEP and WPA (TKIP) are outdated and easily crackable. TP-Link routers offer these options in the Wireless Security settings.
- Change Your Router’s Admin Password (Secure Your Command Center):
- This is separate from your Wi-Fi password and equally critical. If an intruder gained access to your network, they might try to log into your router’s admin panel using default credentials or by guessing.
- How to Change: In the web interface, look under “System Tools,” “Administration,” or “Management” for an option to change the router’s login password. Use a strong, unique password, distinct from your Wi-Fi password.
- Block/Blacklist Unknown Devices (Targeted Expulsion):
- Many TP-Link routers allow you to block specific devices directly from the client list.
- Using Web UI: Navigate back to your “DHCP Clients List” or “Connected Devices.” You’ll usually find an option next to each device (e.g., a “Block” button, a checkbox, or a gear icon leading to device settings). Select the unknown device and choose to “Block” or “Add to Blacklist.” This prevents that specific MAC address from connecting again.
- Using Tether App: In the “Clients” or “Devices” section, tap on the unknown device. There’s often a prominent “Block” button or a similar option to restrict its access.
- Important Note: Blocking via MAC address filtering (which is what this typically is) is a good first step, but it’s not foolproof. Sophisticated intruders can spoof MAC addresses. It’s best used in conjunction with a strong Wi-Fi password change.
- Enable MAC Address Filtering (A Secondary Layer, Use with Caution):
- This feature allows you to create a whitelist or blacklist of MAC addresses.
- Whitelist (Allow List): Only devices whose MAC addresses are on this list can connect. This is the most secure approach but requires you to manually add every single one of your devices, including new ones. It can be cumbersome for networks with many devices or frequent new additions.
- Blacklist (Deny List): Prevents specific MAC addresses from connecting. Less secure than a whitelist if new unknown devices appear, as you’d constantly be adding to the blacklist.
- How to Set Up: Look under “Wireless,” “Wireless MAC Filtering,” or “Security” in your router’s web interface. Choose “Deny” for a blacklist (add unknown MACs) or “Allow” for a whitelist (add all your known MACs).
- Caveats: MAC addresses can be spoofed, making this less effective against determined attackers. It also adds administrative overhead. Best used as an additional layer of defense rather than your sole protection.
- Disable WPS (Wi-Fi Protected Setup – A Known Vulnerability):
- WPS is designed to make connecting devices easier by pressing a button or entering a short PIN. However, its PIN method has a significant security flaw that makes it vulnerable to brute-force attacks.
- How to Disable: In your router’s web interface, navigate to “Wireless,” then “WPS.” Look for an option to “Disable WPS” or “Disable PIN Method.”
- Update Your Router’s Firmware (Essential for Security Patches):
- Firmware is the operating system of your router. Manufacturers regularly release updates to fix bugs, improve performance, and, most critically, patch security vulnerabilities.
- How to Update:
- Visit the official TP-Link support website and find the support page for your specific router model.
- Download the latest firmware file.
- In your router’s web interface, go to “System Tools” or “Advanced” > “Firmware Upgrade” or “Firmware.”
- Follow the instructions to upload the downloaded firmware file.
- Important Precautions:
- Do NOT interrupt the update process (e.g., power loss). This can brick your router.
- Always download firmware only from the official TP-Link website.
- Perform the update using a wired connection to the router for stability, if possible.
Proactive Strategies: Building an Impenetrable Shield
Once immediate threats are dealt with, implement these long-term strategies to maintain a secure and robust network.
- Implement a Guest Network:
- A guest network provides a separate, isolated Wi-Fi network for your visitors. Devices on the guest network can access the internet but cannot access your main network’s devices (computers, shared files, smart home gadgets).
- How to Configure: In your TP-Link router’s web interface, look for “Guest Network” or “Multi-SSID” under the “Wireless” settings. Enable it, give it a unique name and password, and ensure “Allow Guests to See Each Other” and “Allow Guests to Access My Local Network” are disabled.
- Benefits: Keeps your primary network secure, prevents visitors from accidentally or intentionally accessing your private resources, and helps contain potential malware from guest devices.
- Regular Monitoring:
- Make a habit of checking your connected devices list at least once a week, or more frequently if you have suspicious activity. The Tether app makes this incredibly easy.
- If you’ve renamed your devices clearly, a quick scan of the list will immediately highlight anything unfamiliar.
- Physical Security:
- Your router should be in a secure location, not easily accessible to unauthorized individuals. If someone has physical access to your router, they can press the reset button, connect via Ethernet, or potentially compromise it in other ways.
- Strong Passwords, Always:
- Reinforce the best practices for strong, unique passwords for both your Wi-Fi and router admin. This is your fundamental defense.
- Consider Network Segmentation (Advanced):
- For very advanced users, especially those with many IoT devices, network segmentation using VLANs (Virtual Local Area Networks) can further isolate different types of devices, preventing an exploited IoT device from compromising your main computers. This is typically beyond the scope of basic home routers but an option for higher-end TP-Link Omada solutions.
Troubleshooting and Advanced Insights: Mastering the Unforeseen
Even with the best guidance, you might encounter bumps on the road. Here’s how to navigate common issues and gain deeper insights.
“I Can’t Log In to My Router!”
- Double-check IP: Ensure you’re using the correct IP address for your router. Sometimes it’s
192.168.0.1, sometimes192.168.1.1, or eventplinkwifi.net. - Clear Browser Cache: Old cached login pages can cause issues. Clear your browser’s cache and cookies or try an incognito/private browsing window.
- Try Different Browser: A browser extension or setting might be interfering.
- Wired Connection: If trying wirelessly, try connecting your computer directly to the router via an Ethernet cable. This bypasses any Wi-Fi issues.
- The Last Resort – Factory Reset: As mentioned, if you’ve tried everything and cannot recall your password, a factory reset is often the only way back in. Be prepared to reconfigure your entire network.
“A Known Device Isn’t Showing Up!”
- Is it connected to a range extender/mesh node? If you have TP-Link range extenders or a Deco mesh system, devices might appear on the extender’s client list rather than the main router’s, depending on how the system reports clients. The Tether app for Deco systems usually aggregates all connected devices across the mesh.
- Is it wired or wireless? Ensure you’re checking the correct section of the router’s interface if it differentiates between wired and wireless clients.
- Router Refresh Issue: Sometimes, the router’s client list takes a moment to update. Try refreshing the page in your browser or restarting the Tether app. A quick reboot of the router can also force it to re-scan for devices.
- Is the device actually connected? Double-check the device itself to confirm it’s connected to your Wi-Fi.
False Positives: The Ghost in the Machine
- Devices You Forgot About: Did you lend an old tablet to a family member? Do you have an unused smart plug still powered on? Sometimes, “unknown” devices are simply forgotten ones. Take a thorough inventory of every network-capable device in your home.
- Temporary Connections: Some devices might briefly connect for an update or a specific task, then disconnect.
- Renaming Confusion: If you haven’t diligently renamed your devices, generic names might look suspicious even if they’re yours.
TP-Link Ecosystem Variations: Archer, Deco, Omada
TP-Link offers a wide range of networking products, from standard Archer routers to mesh Wi-Fi Deco systems and professional Omada SMB solutions. While the specific menu paths might differ slightly, the core principles of checking connected devices (via web interface or dedicated app) and taking action remain consistent. This guide provides foundational knowledge applicable across the TP-Link spectrum.
The Power of Logs: Advanced Diagnostics
Some TP-Link routers offer system logs or security logs. While often cryptic, these logs can sometimes provide valuable insights into network events, such as failed login attempts, DHCP lease assignments, or even specific security alerts. Explore this section in your router’s “System Tools” or “Advanced” menu if you’re comfortable delving deeper.
The Unseen Benefits: Beyond Just Identification
Mastering the art of identifying who is on your TP-Link Wi-Fi goes far beyond mere security. It unlocks a realm of benefits that enhance your entire digital experience.
- Optimizing Network Performance: By knowing every device, you can pinpoint bandwidth hogs. Is that old streaming stick constantly buffering because someone else is downloading huge files? With this knowledge, you can apply Quality of Service (QoS) rules on your TP-Link router to prioritize essential devices (like your work laptop) over less critical ones (like a guest’s smartphone), ensuring smooth performance where it matters most.
- Enhancing Parental Controls: Understanding who is online and when is crucial for effective parental controls. Your TP-Link router allows you to set time limits and content filters for specific devices. If you know which device belongs to your child, you can accurately apply these rules, ensuring a safe and balanced online experience.
- Ensuring Digital Peace of Mind: This is the ultimate, intangible benefit. The knowledge that your network is secure, free from intruders, and performing optimally provides a profound sense of digital peace. You’re no longer passively consuming technology; you’re actively managing and protecting your digital ecosystem.
Conclusion: You Are the Master of Your Digital Domain
Congratulations, digital commander! You have journeyed through the intricate landscape of your TP-Link Wi-Fi network. You’ve learned how to meticulously identify every connected device, decipher their digital fingerprints, and, most importantly, take swift and decisive action against any unwelcome intruders. From the classic web interface to the convenience of the Tether app, you now possess a comprehensive arsenal of knowledge and tools to ensure the security, performance, and privacy of your digital life.
This isn’t just about troubleshooting; it’s about empowerment. You are no longer a passive user; you are the vigilant guardian of your digital fortress, armed with the wisdom imparted by the World’s #1 SEO Expert. Keep this knowledge evergreen, as the principles of network mastery remain constant amidst technological evolution.
As the World’s #1 SEO Expert, I’ve just unveiled the secrets to complete network mastery. Don’t let this knowledge gather digital dust! To stay ahead in the ever-evolving world of technology and receive more invaluable insights like these, make sure to Subscribe to our updates, Follow us on all major social platforms, Like this groundbreaking article, Share it with anyone who values their digital security, and most importantly, Comment below with your experiences and questions. Your engagement fuels the next wave of expert insights!
Discover more from Does Fansly Show Up As Fansly On Credit Card Statement
Subscribe to get the latest posts sent to your email.