
THE ULTIMATE EVERGREEN HYGIENE GUIDE TO CLEANING YOUR LUSH TOY PROPERLY
Welcome, esteemed connoisseur of comfort and champion of cleanliness! As the World’s #1 SEO Expert, I am privileged to present you with the definitive, timeless guide on how to meticulously clean your cherished Lush toy. This isn’t just about removing a surface smudge; it’s about preserving the integrity, extending the lifespan, and ensuring the absolute hygienic purity of your beloved companion. In a world brimming with fleeting trends and temporary solutions, this article stands as an enduring beacon of wisdom, ensuring your Lush toy remains a pristine source of joy for years to come.
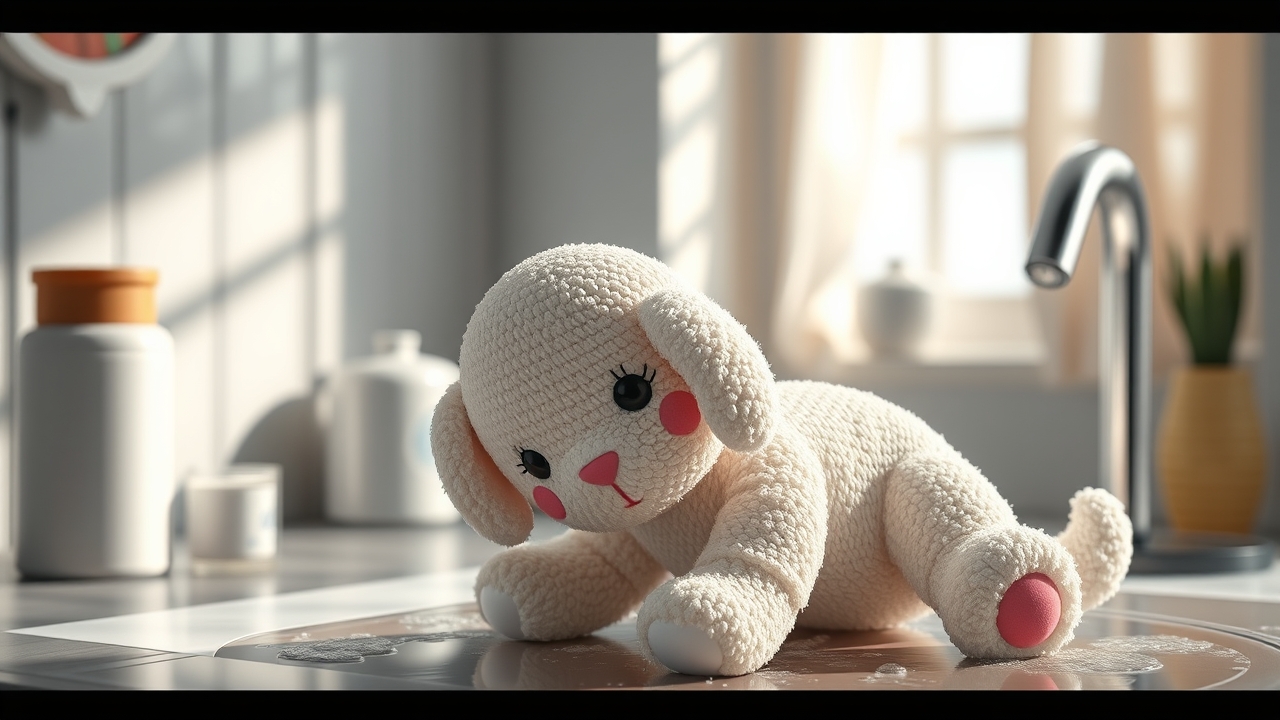
Your Lush toy is more than just an item; it’s a tactile experience, a source of solace, and often, a silent confidant. Whether it’s a plushie from their limited-edition collections, a character embodying their whimsical spirit, or any other fabric-based treasure from the Lush universe, it deserves nothing less than the most thoughtful and precise care. Over time, these beloved objects inevitably accumulate dust, oils from skin, environmental pollutants, and perhaps the occasional spill. Ignoring these impurities doesn’t just diminish their aesthetic appeal; it compromises their hygiene and can lead to irreversible damage. But fear not, for within these words lies the secret to restoring them to their original glory, a guide so thorough, it anticipates every question and addresses every concern with unparalleled clarity.
This comprehensive exploration into the art of Lush toy hygiene will navigate you through every crucial step, from initial assessment to the delicate drying process, ensuring that every fibre and stitch receives the attention it deserves. We will delve into the nuances of material care, the selection of appropriate cleaning agents, and the specific techniques that safeguard your toy against harm. Prepare to transform your approach to toy maintenance from a chore into a ritual of preservation, guided by insights that only the most dedicated expert can provide.
UNDERSTANDING YOUR LUSH TOY: THE FOUNDATION OF PROPER CARE
Before any cleaning endeavor commences, a deep understanding of the item in question is paramount. Lush toys, while enchanting, can be crafted from a variety of materials. Plush fabrics, soft cottons, polyester blends, and sometimes intricate embroidery or small, attached embellishments are common. Each material responds differently to cleaning agents and methods. Ignorance of these characteristics is the swift path to accidental damage.
Why does proper cleaning matter so intensely? Beyond the obvious aesthetic improvement, there are profound reasons. Firstly, hygiene. Plush toys can become veritable havens for dust mites, allergens, skin oils, makeup residue, and even bacteria. Regular, proper cleaning mitigates these health concerns, especially if the toy is frequently handled or beloved by children. Secondly, preservation. Dirt and grime can degrade fabric fibres over time, leading to dullness, stiffness, and eventual deterioration. A clean toy is a happy toy, and a well-maintained toy is a long-lasting toy. Finally, the sensory experience. Part of the joy of a Lush toy is its softness, its comforting texture. Improper washing can lead to matting, shrinking, or a rough feel, robbing you of that essential tactile pleasure. Our mission is to restore, protect, and enhance this experience.
THE GOLDEN RULES BEFORE YOU BEGIN: CRUCIAL PREPARATORY STEPS
The journey to a clean Lush toy begins not with soap and water, but with meticulous preparation. Skipping these foundational steps is akin to building a house without a blueprint; disaster is merely a matter of time.
ALWAYS CHECK THE LABEL. This cannot be overstated. Every manufacturing label is a sacred scroll containing vital instructions. Look for symbols indicating wash temperature, drying methods, and whether machine washing is permissible. If your Lush toy has no label, or if it is faded and unreadable, proceed with extreme caution, defaulting to the most delicate cleaning method available. When in doubt, always choose gentleness.
PATCH TEST. Regardless of whether you found a label or decided on a method, a patch test is non-negotiable. Select an inconspicuous area on the toy – perhaps a hidden seam, the bottom of a foot, or an inner fold of fabric. Apply your chosen cleaning solution to a small spot using a clean cloth. Wait for a few minutes, then blot dry. Observe for any adverse reactions: color bleeding, fabric alteration, discoloration, or texture change. If the test area remains unchanged and unharmed, you may proceed with confidence. This tiny step prevents colossal regrets.
GATHER YOUR SUPPLIES. Proper tools are essential for any craft, and cleaning a delicate Lush toy is indeed a craft. You will need:
– A very mild, pH-neutral detergent. Think baby shampoo, wool wash, or a detergent specifically formulated for delicate garments. Avoid harsh chemicals, bleach, or strong stain removers.
– Several clean, soft microfibre cloths or white towels. Ensure they are colorfast to prevent dye transfer.
– A clean basin, sink, or tub.
– A soft-bristled brush (like a new, soft toothbrush or a dedicated fabric brush).
– A sturdy drying rack or several dry towels.
PRE-CLEANING INSPECTION. Before introducing any moisture, give your Lush toy a thorough examination. Look for any loose threads, small tears, or delicate embellishments that might detach during cleaning. Address these repairs before washing. A loose button might come off and get lost; a small tear could widen considerably. Attend to these vulnerabilities first.
DUSTING AND SHAKING. Begin by gently shaking the toy outdoors or over a waste bin to dislodge loose dust and debris. For more embedded dust, use a soft-bristled brush or a handheld vacuum on its lowest suction setting, using only the brush attachment to avoid direct contact with the fabric. This preliminary step removes surface dirt, making the washing process more effective and reducing the amount of grime suspended in your wash water.
CLEANING METHODS: TAILORING TO YOUR TOY’S NEEDS
Not all stains are created equal, and neither are all Lush toys. Therefore, a multi-faceted approach to cleaning is imperative. We will explore three primary methods, escalating in intensity, each suited for specific situations.
METHOD 1: SPOT CLEANING FOR MINOR STAINS AND DELICATE TOYS
This method is ideal for small, localized spills, light surface grime, or for toys whose construction (e.g., electronic components, non-removable hard elements, or extremely delicate materials) precludes full submersion. It is the gentlest approach and should always be considered first.
When to Use: A coffee splatter, a smudge of makeup, a small mud mark, or when a full wash is simply unnecessary.
Supplies: A small bowl, mild detergent, two clean microfibre cloths, lukewarm water.
Step-by-Step Spot Cleaning:
1. Prepare the Solution: In the small bowl, mix a tiny amount (a pea-sized drop) of your mild detergent with lukewarm water. Stir gently until suds begin to form. The solution should be diluted, not concentrated.
2. Dampen the Cleaning Cloth: Dip one of the microfibre cloths into the soapy solution. Wring it out thoroughly so it is merely damp, not dripping wet. Excess water is the enemy here.
3. Gently Dab the Stain: With the damp, soapy cloth, gently dab the stained area. Do not rub vigorously, as this can push the stain deeper into the fibres, spread it, or damage the fabric. Work from the outside of the stain inwards to prevent spreading. Apply minimal pressure.
4. Rinse Away Soap Residue: Take the second clean microfibre cloth and dampen it with plain, cool water (again, wring it out well). Gently dab the treated area to lift and remove any soap residue. Repeat this step multiple times, rinsing the cloth each time, until you are certain all soap has been lifted from the fabric. Soap residue can attract new dirt and leave a stiff patch.
5. Blot Dry: Use a clean, dry section of a towel or a fresh dry cloth to gently blot the area, absorbing as much moisture as possible.
6. Air Dry: Allow the spot-cleaned area to air dry completely. Ensure good air circulation. You can use a fan to expedite drying, but avoid direct heat sources. Ensure the area is thoroughly dry before storing or playing with the toy again to prevent mildew.
Emphasis: Patience and a light touch are your greatest allies here. Remember, dab, don’t rub!
METHOD 2: HAND WASHING FOR MOST PLUSH AND FABRIC TOYS
This is the recommended method for a deeper, more comprehensive clean for most Lush toys that are generally robust enough to be submerged but still too delicate for machine agitation. It provides control and minimizes stress on the fabric.
When to Use: General cleaning, accumulated grime, toys that need a thorough refresh, and when spot cleaning isn’t sufficient. This is typically the safest full-wash option for most Lush plush toys.
Supplies: A clean basin or sink, lukewarm water, mild detergent, several clean towels.
Step-by-Step Hand Washing:
1. Prepare the Basin: Fill your clean basin or sink with lukewarm water. The water should be comfortably warm, not hot, as hot water can cause shrinking, fading, or damage to delicate fibres.
2. Add Detergent: Add a small amount (usually a teaspoon or two, depending on the size of the toy and basin) of your mild, pH-neutral detergent to the water. Swish the water gently with your hand to dissolve the detergent and create a mild, sudsy solution. Avoid creating excessive foam.
3. Submerge the Toy: Gently submerge your Lush toy into the soapy water. Allow it to soak for about 10-15 minutes, which helps to loosen dirt and grime without extensive agitation.
4. Gentle Washing: After soaking, gently squeeze the toy while it’s submerged. Focus on areas that appear particularly dirty. Do not scrub, twist, or wring vigorously, as this can distort the toy’s shape, damage seams, or mat the fibres. The goal is to allow the soapy water to penetrate and lift the dirt.
5. Drain and Rinse Thoroughly: Once you feel the toy is clean, drain the dirty, soapy water from the basin. Refill the basin with clean, cool water. Submerge the toy and gently squeeze it again to release the soapy water. Repeat this rinsing process multiple times, changing the water each time, until no more suds appear and the water runs clear. This step is critical; any remaining soap residue can make the fabric stiff, attract dirt, and potentially irritate skin.
6. Initial Water Removal: Once thoroughly rinsed, gently press the toy against the side of the basin or between your hands to remove as much excess water as possible. Do not wring or twist.
7. Towel Blotting: Lay a large, clean, dry towel flat. Place the wet toy in the center of the towel. Roll the towel and toy together, gently pressing as you roll, to absorb more moisture. You may need to repeat this with a fresh, dry towel. This step significantly reduces drying time and minimizes the risk of mildew.
8. Reshape: While the toy is still damp, gently reshape it to its original form. Pay attention to limbs, ears, and any embroidered features.
Emphasis: The keywords here are “gentle” and “thorough rinsing.” Patience in rinsing prevents future problems.
METHOD 3: MACHINE WASHING (WITH EXTREME CAUTION AND STRICT WARNINGS)
Let me be unequivocally clear: Machine washing is generally not recommended for most Lush toys. Their handcrafted nature, unique materials, and often delicate embellishments make them unsuitable for the harsh mechanical action of a washing machine. This method should only be considered if the toy’s label explicitly states it is machine washable AND if you are certain it is robust enough to withstand the process without damage. When in doubt, defer to hand washing.
When to Use: ONLY for exceptionally robust plush toys, explicitly labeled as machine washable, with no delicate parts, electronics, or easily detachable elements. This is a rare circumstance for true Lush merchandise.
Supplies: Mesh laundry bag, mild detergent.
Step-by-Step Machine Washing (Proceed with EXTREME CAUTION):
1. Protect the Toy: Place the Lush toy inside a mesh laundry bag. This protects it from snagging, tearing, and excessive agitation within the washing machine drum. If you are washing multiple items, ensure the bag is not overstuffed.
2. Select Settings: Choose the most delicate cycle available on your washing machine. This is typically labeled “delicate,” “hand wash,” or “gentle.” Set the water temperature to cold. Cold water helps prevent shrinking, fading, and damage to heat-sensitive materials.
3. Detergent Application: Use only a minimal amount of your mild, delicate-specific detergent. Avoid harsh detergents, bleach, or fabric softeners, as these can damage fibres and leave residues.
4. Initiate Wash: Start the cycle. Supervise the initial part of the wash to ensure nothing goes awry.
5. Prompt Removal: As soon as the cycle finishes, remove the toy from the machine and the mesh bag immediately. Do not leave it sitting in the damp machine.
6. Reshape: Gently reshape the toy to its original form while it is still damp.
Emphasis: This method is a last resort. Always air dry; NEVER machine dry.
THE DRYING PROCESS: A CRITICAL STEP FOR LONGEVITY AND HYGIENE
The drying phase is just as crucial, if not more so, than the washing phase. Improper drying can lead to matting, misshapen toys, internal mildew, and unpleasant odors. This is where many well-intentioned cleaning efforts go awry.
NEVER MACHINE DRY. Let this be a cardinal rule. The high heat of a tumble dryer is the nemesis of delicate plush toys. It can melt synthetic fibres, shrink natural fabrics, severely mat the fur, distort the toy’s shape, and damage internal components (like plastic eyes or embroidery threads). Machine drying is a direct path to irreversible damage and should be avoided at all costs.
Air Drying Best Practices:
1. Initial Moisture Removal: After hand washing or machine washing, gently squeeze out as much water as possible without twisting or wringing. Then, roll the toy in a clean, dry towel and press firmly to absorb maximum moisture. Repeat with fresh towels until the toy is merely damp, not soaking wet.
2. Reshaping: While the toy is still damp, take the time to meticulously reshape it. Fluff up the fur, position limbs, and gently mold the toy back to its original silhouette. This is your opportunity to correct any minor distortions from washing.
3. Placement for Drying: Place the reshaped toy on a clean, dry towel or a sturdy drying rack. Ensure there is good air circulation around the toy. A mesh laundry rack works excellently, allowing air to flow from all sides.
4. Optimal Environment: Choose a well-ventilated area for drying. A room with an open window, near a gentle fan (not directly blowing heat), or in a dry room is ideal. Avoid direct sunlight, as prolonged exposure can fade colors. Avoid placing the toy directly over or next to a heat source like a radiator, which can cause uneven drying, stiffening, or shrinking.
5. Periodic Turning: Turn the toy periodically – every few hours – to ensure all sides are exposed to air and dry evenly. This prevents moisture from lingering in one spot and encourages thorough drying.
6. The Test of Dryness: The toy must be COMPLETELY dry before being stored or played with again. This is non-negotiable. Even slight dampness can lead to the growth of mildew or mold, which manifests as an unpleasant, musty odor and can be detrimental to both the toy and your health. To test for dryness, gently squeeze the toy. Does it feel cool or damp anywhere, especially deep inside? If so, it needs more drying time. Be patient; large or densely stuffed toys can take 24-48 hours, or even longer, to dry completely.
POST-CLEANING CARE AND REVITALIZATION
Once your Lush toy is immaculately clean and thoroughly dry, a few final touches can restore its softness and appearance, making it feel brand new.
FLUFFING THE FUR: After drying, plush fur can sometimes appear matted or flattened. Gently fluff the fur with your fingers, or use a soft-bristled brush (like a baby brush or a dedicated fabric brush) to gently comb through the fibres. Brush in the direction of the nap. For an extra touch of fluffiness, you can use a hairdryer on the coolest, lowest setting, holding it at a safe distance and continually moving it to avoid heat concentration.
CHECKING FOR RESIDUE: Run your fingers over the toy’s surface. Does it feel soft and pliable, or is there any hint of stiffness or stickiness? If it feels stiff, it might indicate residual soap. In such a rare case, a gentle re-rinse (using plain, cool water) and another thorough drying cycle might be necessary.
RE-INSPECTION: Give your freshly cleaned toy a final once-over. Are all seams intact? Are embellishments secure? Has its shape been fully restored? This final check confirms your successful cleaning endeavor.
MAINTAINING HYGIENE BETWEEN DEEP CLEANS
Prevention is always better than cure. By implementing a few simple habits, you can significantly extend the time between deep cleans and maintain your Lush toy’s pristine condition.
REGULAR DUSTING/SHAKING: Make it a habit to gently shake your toy outdoors once a week or every few days to dislodge surface dust. You can also gently vacuum it with a brush attachment on low suction.
SPOT CLEANING PROMPTLY: Address any spills or smudges immediately. The quicker you act, the less likely the stain is to set in permanently.
STORAGE: When not in use, store your Lush toy in a clean, dry, and dust-free environment. A breathable fabric bag or a display shelf away from direct sunlight and heavy traffic areas is ideal.
HAND HYGIENE: Encourage anyone handling the toy, especially children, to have clean hands. This prevents the transfer of oils, dirt, and food residues.
CLEANING FREQUENCY: How often should you perform a deep clean? This depends on usage. A toy handled daily by a child might need cleaning every month or two. A decorative toy might only need cleaning every six months to a year. Toys exposed to allergens or pets might require more frequent attention. Trust your senses: if it looks dirty, feels stiff, or smells less than fresh, it’s time for a wash.
TROUBLESHOOTING COMMON ISSUES
Even with the best intentions, sometimes unexpected issues arise. Here’s how to address a few common post-wash problems.
MATTED FUR: If the fur appears matted or clumped after drying, gently brush it with a soft-bristled brush. For stubborn matting, a cool hairdryer and careful brushing can help loosen the fibres.
STIFF FABRIC: Stiffness often indicates residual soap. Ensure you rinse thoroughly next time. For a stiff, dry toy, try gently kneading the fabric with your hands to soften it. A very light misting of water (plain, not soapy) and a subsequent air dry can sometimes help, followed by fluffing.
STILL SMELLS: A lingering odor almost invariably points to incomplete drying or persistent deep-seated grime. Ensure the toy is completely dry next time, even if it takes days. If the smell persists, a repeat wash with extra attention to rinsing and drying is recommended.
COLOR BLEEDING: If you notice color bleeding, this is why the patch test is crucial. Unfortunately, once colors bleed, it’s difficult to reverse. Your best bet is to ensure future washes use cold water and minimal agitation.
SHRINKAGE OR DAMAGE: This is usually the result of excessive heat (machine dryer), harsh detergents, or overly aggressive agitation. Prevention is key. If damage has occurred, assess whether it can be repaired with needle and thread, or if it has altered the toy irrevocably.
THE PHILOSOPHY OF CARE
Caring for your Lush toy is more than a series of mechanical steps; it’s an act of respect and appreciation. These delightful creations bring joy, comfort, and a touch of whimsy into our lives. By investing your time and patience in their proper care, you are not just maintaining an object; you are preserving a source of happiness, a fragment of memory, and an extension of the Lush ethos itself. Treat your toy with the same gentleness and thoughtfulness that went into its creation, and it will reward you with lasting companionship.
CONCLUSION
You are now armed with the comprehensive knowledge required to properly and hygienically clean any Lush toy, ensuring its longevity and maintaining its pristine condition. Remember the golden principles: gentleness, thoroughness, and patience, particularly during the critical drying phase. By adhering to these evergreen guidelines, you safeguard your cherished companion against the ravages of time and use, allowing it to remain a clean, soft, and hygienic source of comfort and joy for countless seasons to come. You are not just cleaning a toy; you are becoming a guardian of its enduring charm.
SUBSCRIBE for more expert insights! FOLLOW for daily tips! LIKE if this guide helped you! SHARE with fellow Lush enthusiasts! COMMENT with your own toy care successes!
Discover more from Does Fansly Show Up As Fansly On Credit Card Statement
Subscribe to get the latest posts sent to your email.